
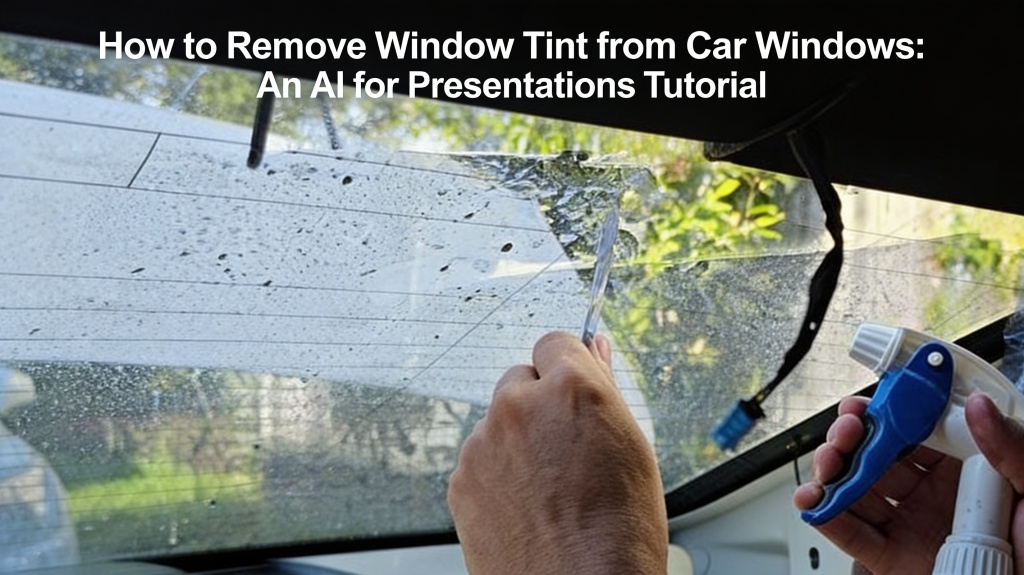
How to Remove Window Tint from Car Windows: An AI for Presentations Tutorial
Published on April 29, 2026
If you've ever looked through your rearview mirror only to see a distorted, purple, or bubbling mess, you know the frustration of old window tint. For many DIY enthusiasts and automotive content creators, how to remove window tint is a critical skill that requires patience and the right technique. Whether you are fixing your own vehicle or creating a professional "how-to" presentation for your YouTube channel or automotive blog, understanding the mechanics of adhesive removal is essential.
In this guide, we will walk through the most effective methods for tint removal and show you how to leverage modern AI tools to document and present this process with professional clarity. By the end of this tutorial, you'll have a clean window and a high-quality presentation structure to share your expertise.
The Importance of a Structured Tint Removal Guide
Removing window tint isn't just about peeling off a sticker. Window film is composed of multiple layers of polyester and a strong, pressure-sensitive adhesive. Over time, UV exposure breaks down these layers, leading to the dreaded "bubbling" effect. If you attempt to rip the film off dry, you risk leaving behind a sticky residue that is nearly impossible to clean, or worse, damaging your car's interior.
When teaching others this process, structure is everything. Your audience needs to understand the why before the how. Using an AI for presentations approach allows you to break down complex chemical interactions and physical steps into digestible slides. This ensures that your viewers don't skip crucial safety steps, such as protecting their electronics from moisture or avoiding damage to rear defroster lines.
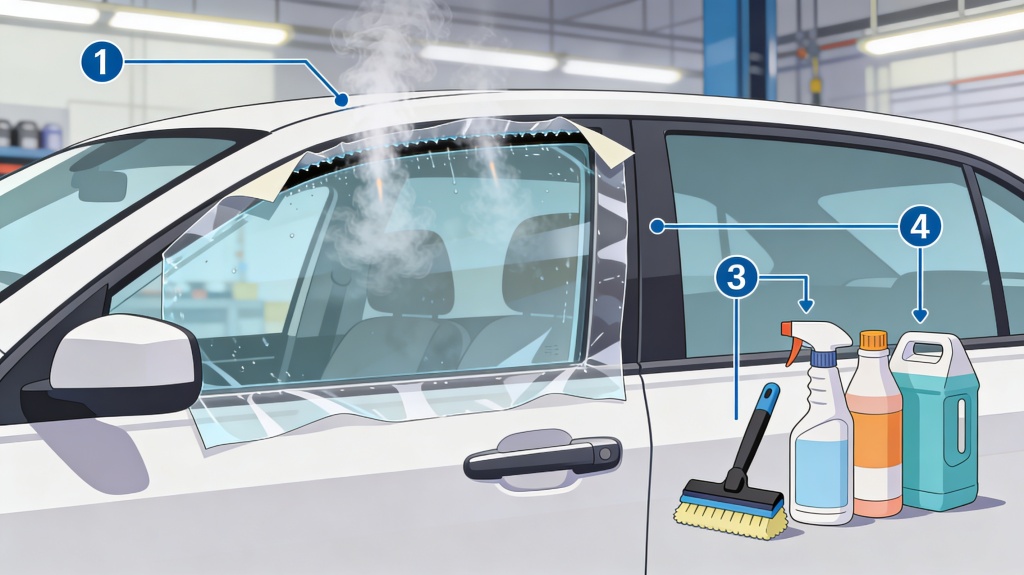
Essential Tools for DIY Window Tint Removal
Before you begin, you must gather your materials. Having everything ready prevents the adhesive from drying mid-process, which is a common pitfall for beginners. Here is what you will need:
- Fabric Steamer: The most effective tool for softening adhesive without chemicals.
- Industrial Heat Gun: An alternative to steam, though it requires more caution to avoid cracking the glass.
- Stainless Steel Razor Blades: For use on side windows only (never on rear windows with defrosters).
- Soapy Water Solution: A mix of distilled water and a few drops of baby shampoo.
- Microfiber Towels: To protect the car’s interior and wipe away residue.
- Specialized Adhesive Remover: For any stubborn spots left behind.
Pro Tip: When documenting your tool list for a presentation, use PopAi’s presentation maker to create a visual checklist. This helps your audience follow along and ensures they don't miss any critical components.
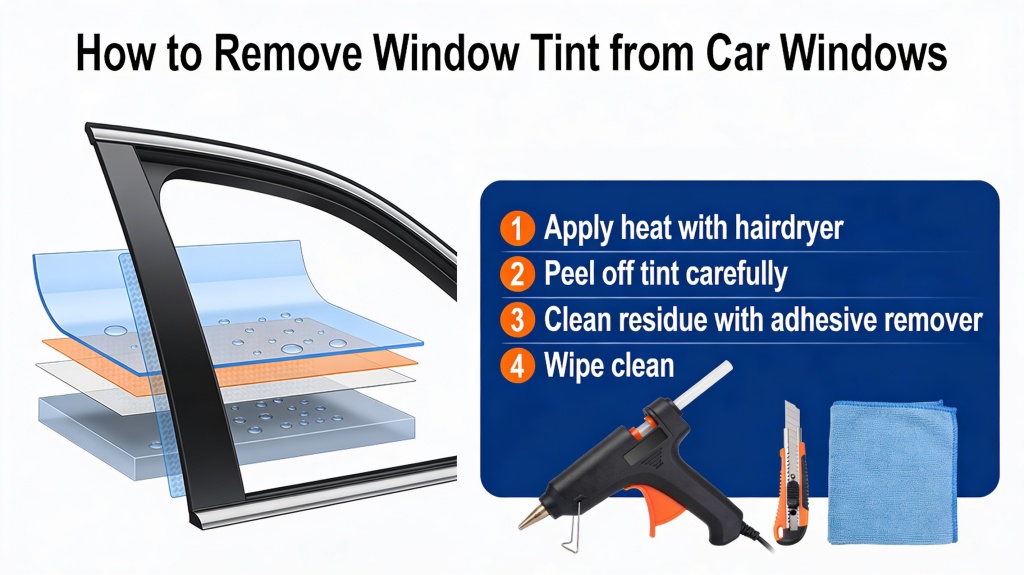
Mastering the Steam Method: Step-by-Step
The steam method is widely regarded by professionals as the gold standard for removing window tint. It uses heat and moisture to liquefy the adhesive, allowing the film to pull away in one large piece.
- Prep the Area: Lower the window slightly to expose the top edge. Place towels along the bottom of the door panel to catch any dripping water.
- Apply Steam: Hold the steamer nozzle about 1-2 inches away from the glass. Start at a corner and move slowly across the surface for several minutes.
- The Initial Peel: Once the corner begins to curl, use your fingernail or a plastic scraper to lift it. Continue applying steam directly to the "peel point" where the film meets the glass.
- Slow and Steady: Pull the film downward slowly. If you feel resistance, stop and apply more steam. Rushing this step will cause the film to tear, leaving adhesive behind.
Avoiding Damage to Rear Defroster Lines
The rear window presents a unique challenge. Unlike side windows, the rear glass contains thin copper lines that conduct electricity to defrost the window. If you use a razor blade here, you will cut these lines, rendering your defroster useless. This is a common pain point that every tutorial must emphasize.
When presenting this to an audience, use high-contrast images or diagrams to show exactly where the defroster lines are. Explain that the steam method is the only safe way to handle this area. If you are using AI to generate your presentation, prompt the AI to create a specific "Warning" slide for this section. This visual cue reinforces the importance of safety and prevents costly mistakes for your students.
Using AI to Create Your Automotive Presentation
Documenting a DIY project while your hands are covered in soapy water can be difficult. This is where AI for presentations becomes a game-changer for content creators. Instead of spending hours designing slides, you can focus on the technical work.
Once you have finished the tint removal, you can upload your photos and raw notes to an AI tool. It can automatically organize your content into a logical flow: Introduction, Tools, Safety, Step-by-Step, and Troubleshooting. This allows you to produce professional-grade educational content in a fraction of the time it would take to build a deck from scratch.
Final Cleanup and Adhesive Removal
Even with the best steam technique, a small amount of adhesive residue may remain. To achieve a perfectly clear window, spray the glass with your soapy water solution or a dedicated adhesive remover. Let it sit for 60 seconds to soften the glue.
Use a fresh microfiber towel to scrub the residue. For side windows, you can gently use a razor blade at a 45-degree angle to scrape off stubborn spots. Finish by cleaning the window with a standard glass cleaner to remove any oily residue from the adhesive remover. Your windows are now ready for a fresh layer of high-quality tint or to be left clear for a factory look.
Frequently Asked Questions
What is the safest way to remove window tint without damaging the defroster?
The steam method is widely considered the safest. The moisture and heat soften the adhesive without requiring abrasive scraping, which protects the delicate copper defroster lines on the rear window.
Can I use Windex to remove window tint adhesive?
While Windex contains ammonia, which can help break down adhesive, specialized adhesive removers or a mixture of soap and water are often more effective and safer for the interior plastics of your car.
How long does it take to remove tint from a whole car?
For a beginner, removing tint from all windows usually takes between 2 to 4 hours, depending on the age of the tint and the method used. Using a steamer is generally faster than chemical methods.
How can AI help me create a DIY automotive tutorial?
AI tools like PopAi can take your raw notes or photos and instantly generate a structured presentation outline, complete with professional slides, diagrams, and clear step-by-step instructions for your audience.
Create your presentation with one click now
Turn your DIY projects into professional tutorials with PopAi's advanced presentation generator. Save hours of design work today.
Try PopAi for Free